

Let's Talk Tactics - Initiative & The First Round
***Updates have been added to the original article based on some great feedback, and me being, well…an idiot. Updates are in Italics where appropriate.
Let's talk about combat tactics. Everyone loves combat, but there is so much more to it than just kill your opponents. Anyone can swing a sword or scream "Fireball!" and any DM worth their salt adjusts based on what the players are doing. A DM's job is not to kill the player's characters, but to provide them with a challenging scenario. If the characters go all Leeroy Jenkins and rush in without a second thought then they shouldn't blame the DM if their characters die a bloody death.
Too often, we rely on brute force to overpower the bad guys. If that doesn't work, we complain that we aren't getting enough magic items. Or we blame our dice because it's always the dice. But all it takes is a few minutes of discussion, planning, and follow through to turn the tables on the DM and force them to come up with better encounters. Most DM’s relish this opportunity! Let's take a look at combat, how it works, and start to scratch the surface of how combat tactics can bring a whole new level of excitement to your game.
Combat consists of a series of rounds, each of which is made up of several turns. An average encounter will take 3-5 rounds. Each round represents 6 seconds, during which time each character and creature takes a turn. To determine the order of these turns, we roll initiative, and if you're like me, you roll low every goddamn time. Once everyone takes a turn, the round ends, and we start all over again until either your opponents or the party are vanquished. Based on this information, the average combat takes 24 seconds, in which time the fate of you, your party, and the bad guys all hang in the balance.
The PHB lists the stages of combat as follows:
COMBAT STEP-BY-STEP
1. Determine surprise. The DM determines whether anyone involved in the combat encounter is surprised.
2. Establish positions. The DM decides where all the characters and monsters are located. Given the adventurers' marching order or their stated positions in the room or other location, the DM figures out where the adversaries are — how far away and in what direction.
3. Roll initiative. Everyone involved in the combat encounter rolls initiative, determining the order of combatants' turns.
4. Take turns. Each participant in the battle takes a turn in initiative order.
5. Begin the next round. When everyone involved in the combat has had a turn, the round ends. Repeat step 4 until the fighting stops.Player’s Handbook
For today's article, we are going to look at initiative and how it is crucial in determining your first round actions. Simply put, initiative determines who goes when during combat. Just as combat is about to begin, the DM will tell the table to "roll for initiative," and everyone, including the DM, grabs their favorite d20 and make what is essentially a Dexterity Check to determine where they fall in the turn order. The person with the highest score goes first, next highest second, and so forth. Ties are decided in a variety of ways. Some DMs determine who goes first. Others let the players decide amongst themselves. At our table, Stephen allows us to choose, but we usually fall back on the rule that when there is a tie, the person with the higher Dexterity score goes first.
The ability to go first provides a decisive advantage, but one that can be easily squandered if characters decide to charge straightforward and attack blindly. On the flip side, a DM can put the party at a severe disadvantage if the monsters go first and bring the hurt before you can unsheath your sword. There are a few ways to increase your initiative modifier and gain an advantage when rolling initiative. First and foremost is increasing one's Dexterity score through ASI. A close second is through class and subclass abilities related to initiative. The Barbarian class gains advantage on initiative rolls at the 7th level. Several subclasses gain advantage as they level up: The scout subclass (rogue) gets advantage on initiative rolls at 13th level, swashbucklers (rogue) add their Charisma modifiers, gloom stalkers (ranger) add their Wisdom modifier, and war magic wizards add their Intelligence modifier as early as 2nd level! (Please feel free to comment on any class/subclasses I may have missed). There are also magic items, feats - ah, the impressive Alert feat - and a few spells that will improve your initiative, either on a permanent or temporary basis.
Below we will take a look at how initiative can impact the decisions made in the first round I realize that every single encounter is unique. The example below doesn't come close to covering the infinite number of possibilities that can occur. That said, today, we are going to touch on a few scenarios for lower-level characters and the 1st round only.

Skeletons in the Dungeon
Our five adventures are as follows (all 1st level)
Helga the Human Barbarian (Blue skirt)
HP 15, Greataxe
Tomas the Goliath Fighter (Blue Tunic)
HP 12, Longsword
Harry the Drow Rogue (Red Tunic)
HP 8, Rapier
Frank the Elven Wizard (Gray Cape)
HP 6, Dagger / Cantrips: mage hand, light, and ray of frost. Spells: burning hands, charm person, feather fall, mage armor, magic missile, and sleep.
Jill the Tiefling Grave Cleric (Red Breastplate)
HP 9, Mace / Cantrips: guidance, sacred flame, spare the dying. Spells: bane, false life, guiding bolt, healing word, and shield of faith.
They are wandering around a dungeon when they walk into a room and stumble upon four skeletons, each with 13 HP and armed with a short sword and a short bow. The DM says, “Roll for Initiative!” and away we go. Our DM is rolling a single initiative for the skeletons as a group. The initiative order is as follows:
Harry (after all, he does have a high Dexterity) - 19
Frank - 16
Skeletons - 14
Tomas - 10
Helga - 9
Jill - 8
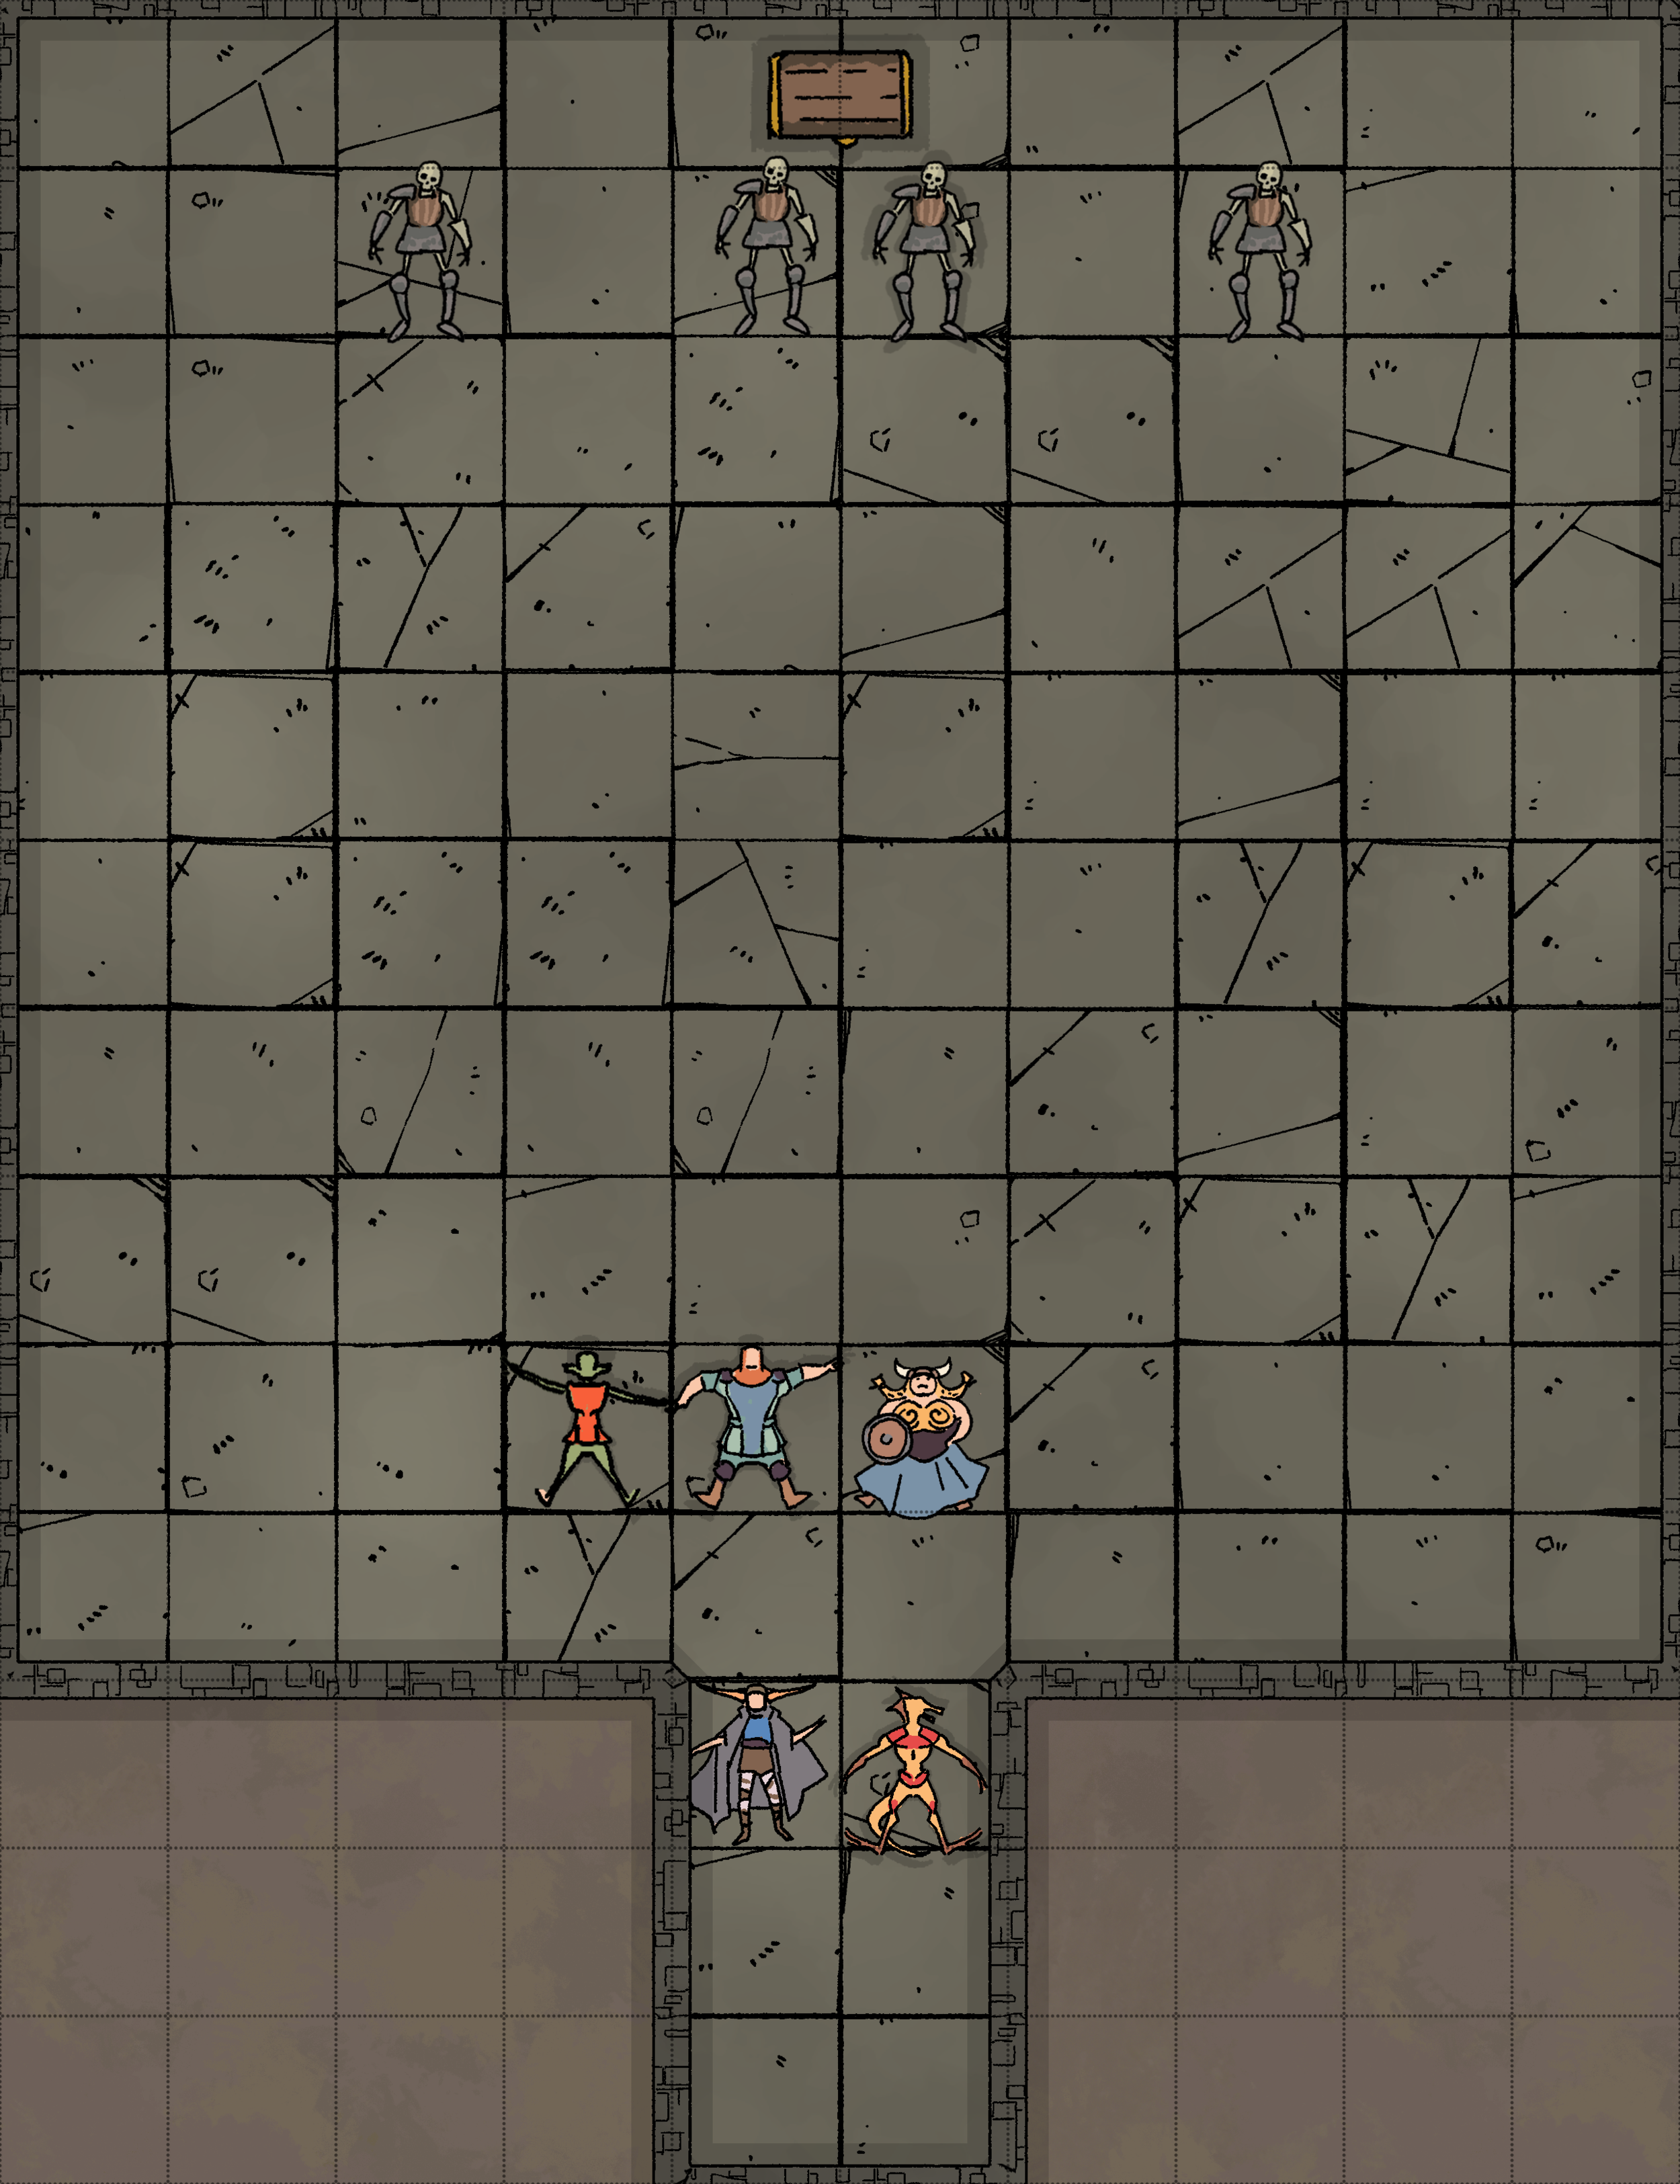
The question is, what to do now? There is exactly 30 feet between the party’s front line and their foes, but their turn is after the skeletons, so they can’t just run up and start tanking. Harry, the rogue, is just out of range at 35 feet and has no intention of running up to say hello. With just a rapier and no chance of a sneak attack, what’s a rogue to do. Harry moves 5 feet next to Tomas. He may have put himself in melee range of the skeletons, but he has set himself up to be able to sneak attack any skeleton that comes down to attempt a melee attack on his next turn. If none of the skeletons move, he is now within range to move up and make a melee attack next round. It may seem like a wasted turn, but Harry has positioned himself well for the next round while limiting the potential for taking damage in doing so. (* Update - Harry did waste his turn. He should have held his action, with the trigger being when a skeleton came within melee range, with his reaction being able to attack.)

Frank has his dagger out, remembers he is a wizard and starts flipping through his spellbook instead. Frank’s no dummy! The Sleep spell would be great here since he would be able to take out at least one skeleton if he rolled just the average of her 5d8 (22 hp), and his dice have been hot of late, so he figured he could take out two. But alas, the undead are immune, so that option is off the table. We are going to assume that because, as we have already claimed, that Frank isn’t a dummy and cast Mage Armor on himself earlier in the day. But the party hasn’t taken a short rest, and he only has a single spell slot left. Frank decides to attack, casting the cantrip Ray of Frost on one of the center skeletons, doing 4 points of damage (and changing him into a mummy! Not really, but you try and find a frozen skeleton token). His logic is as follows - He will do damage, but just as significantly, he is reducing the speed of a skeleton that could move into melee range. By decreasing the skeleton’s speed to 20 feet, it can no longer use a melee attack this round. He decides to stay put, knowing that he can’t get out of range of their short bows, but is currently out of melee range.

The DM excitedly starts the skeleton’s turn. The one skeleton that can get within melee range lurches forward, while the remaining three - the two on each end of the line and the one slowed by the ray of frost - fire their short bows. Targeting our two front line tanks, Helga takes 5 (10) points of damage from an arrow, Tomas takes 5 (7) points of damage from the one melee attack, and the two skeleton’s arrows fly wide of their targets.
Tomas is next, and he is pissed. No one likes getting hit, and that includes our fighter. He takes a mighty swing with his sword, hitting our poor skeleton, doing 7 points of damage (let’s assume he does average damage and has a +3 Strength modifier.) Not wanting to take an attack of opportunity, he does not move. With the chance of taking additional damage, and the chance to inflict damage on an opponent, this was Tomas’ best option given the situation.

Helga is next, and she is extremely angry. Being a barbarian, she uses her bonus action to Rage. Once that is done, she throws caution to the wind. Helga charges forward to attack the skeleton that hit her with an arrow. She moves straight forward 30 feet and swings at the slowed skeleton, doing 9 points of damage (average damage, +3 Strength modifier, +2 rage damage) and killing it, as it has previously taken 4 points of damage via the Ray of Frost. In moving forward, she is subject to an attack of opportunity. The skeleton hits, but the damage is reduced by half since she is raging, and Helga takes 3 points of damage. Helga took a risk. She reduced the overall threat by 25% but has opened herself up to two melee attacks next round. With damage resistance and still having 6 hit points, Helga’s charge worked out. If Helga was unable to eliminate the skeleton, then she would potentially have opened herself up to 3 melee attacks next round and potential unconsciousness.

Finally, we get to Jill, who now has some decisions to make. Her initial plan was to cast Guiding Bolt on one of the skeletons to obliterate it, because killing creatures is fun. She isn't 2nd level yet, so she cannot turn undead. Jill is also worried that even if she kills one on the backline skeletons, and Frank or Henry can manage to kill the skeleton attacking Tomas, that leaves two skeletons, that if they attack, Helga could take some severe damage. There is even the possibility if she gets hit with a crit, of her being knocked unconscious. She could buff Helga with Shield of Faith, but that doesn't solve the problem of three potential attacks on the party if Frank and Henry both miss their attacks. What she wishes she had done was cast Spare the Dying on Helga, especially if they knew she was playing her barbarian more Conan-like than the party was hoping for. What Jill decides on is the best of both worlds, attempting to quicken the chances of the two nearby skeletons dying before their turn AND healing Helga so that she will be able to survive until the cavalry arrives. Jill moves forward 10 feet, making a melee attack against the skeleton with her mace. If she hits for average damage, she will do 4 points of damage (assuming no damage modifier). The skeleton is still standing, but only has 2 HP left and should be killed before it can attack again. Jill then uses her bonus action to cast Healing Word on Helga, restoring enough HP (4) so that even if both skeletons successfully attack her, she will be able to remain standing. Jill strategically moved, attacked, and provided aid to her tank, utilizing her movement, action, and bonus action to maximum effect. Well Done!
(Update - The thought process behind Spare the Dying is incorrect. The concept would be correct if Jill had Death Ward, but alas that is a 4th level spell. Jill should be ready with Spare the Dying, but casting it on Helga before she is knocked unconscious would make no sense at all.)
The first round has come to an end, and the party has a chance of eliminating the skeletons next round, and a very good chance in the third round. Was it a perfect round? No, but is there anything as a perfect round? Given the situation, the party did a good job in the first round, taking out one opponent and severely wounding another. As they are only 1st level and this was a Hard Encounter based on CR, they will need to be careful, work quickly, and hope the dice are in their favor…especially Helga!
As always constructive criticism is appreciated!
Like what we are doing here?
Support us on Patreon!
You’ll get early access to Deep Dives, our Homebrew Hoard, Giveaways, free access to everything in the Dump Stat Store, and more!
Follow us on Twitter to keep up to date on everything we talk about!

